- Home
- Bookkeeping Basics
- Computer Filing System
Computer Filing System
Quick Guide and Tips to Stay Organized
The computer filing system is a great alternative to a physical filing system.
Going digital is the best way to file and store all business documents, or to use as a personal filing system:
- Modern online storage systems are robust and easy to secure with two-factor logins.
- Sharing digital files and documents is so much easier than printed paper.
- Takes up less room in the office and protects from damaging events like fire or flood.
 Bookkeeping Computer Filing System
Digital | Online Filing System
Here I focus on how to use a digital or online system to store all documents relating to the bookkeeping of a business.
The system for saving onto your computer’s hard drive, or saving to an online storage facility are the same – the only thing different is the location.
You may need a scanner for any physical or large documents you receive so you can scan and save them onto your digital system.
For smaller receipts you can take a photo of them with your smartphone and load or email them to your computer or online storage provider such as Dropbox, OneDrive or pCloud.
Tips for filing on your computer:
- make sure
you have enough storage space on your hard drive - 1GB is a good
starting point but that will fill up fast if you save a lot of photos or
videos.
- always back up your hard-drive every day for business purposes
using a removable device such as a flash drive or a portable hard drive
(and keep them in a separate location to the business).
- Or, back-up to
an online facility. Most anti-virus providers have the option to back-up
your folders to their storage site so check it out.

Organize Your Business Documents
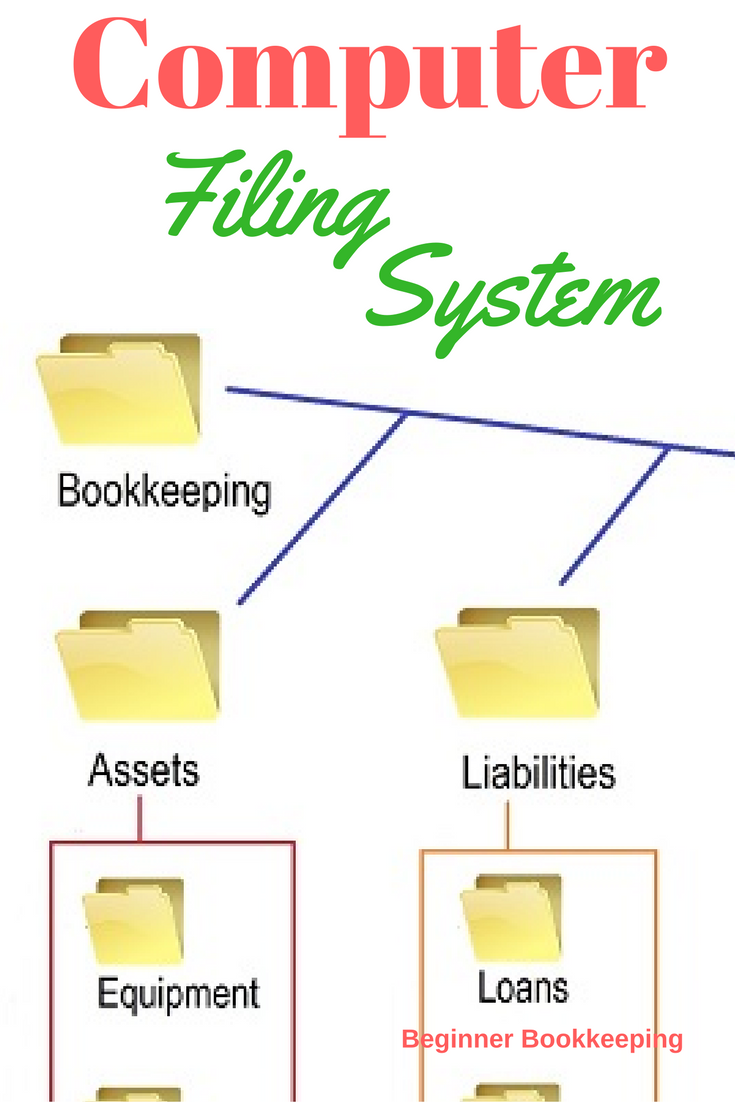
A computer filing system (on your hard-drive or online) contains folders like in this graphic – no doubt you’ve seen them already.
Inside these folders, you can open more folders, and inside those, more folders – so you can have several layers or tiers of folders all with their own names and within those folders you will store your documents, photos and videos.
You can be super organized!
The diagram at the top of this page is a good visual for explaining the computer filing system specifically aimed at organizing your blogging or business financials.
This computer filing system is based exactly on how your data is laid out in bookkeeping software and makes it very easy to find any document you or your bookkeeper require really fast.
Tips for filing online:
To get serious about secure storage and to be able to securely collaborate on and share documents between users I recommend pCloud File Security.
The Business plan costs US$9.99 per month with 1TB storage or save over 20% with an annual payment of US$95.88
The Business Pro plan is US$19.98 per month with 2TB storage and priority support, or save over 20% with an annual payment of US$191.76.
Prices correct as of Feb 2025.
Try it free

This is an affiliate link. I may receive a small commission if you make a purchase.
Step by Step - Computer Filing System organization
So, now we get started.
Keep in mind that the example folders provided here are just that... examples, and there is no restriction to how many folders you can open or what names you give them.
1. The Main Folder
Set up your Main folder. Give it a name, perhaps the name of your business.
To open a new folder, start in your Storage location of choice, right click your mouse and click on New > Folder - then name it.
Double click on your new Main folder to get inside it.
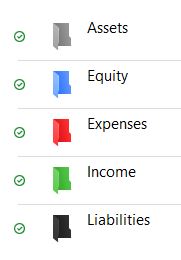
There is a way to change the standard yellow folders into all different colors, or even to have different icons.
- Use Folder Marker and get options to color the folders or change icons.
- Use options right inside Windows to change the icon (right-click a folder, select Properties, Customize, Change Icon, select your icon).
Here is an example that I did using Folder Marker for my main bookkeeping headers. (Folder Marker is not an affiliate link)

Inside the Main Folder
Inside the main folder open the following three folders:
1. Inside the Bookkeeping Documents Folder
Inside the Bookkeeping Documents folder open these five folders:-
- Assets
- Liabilities
- Equity
- Income
- Expenses
Inside these five main bookkeeping folders we need to open more folders - starting to dive deep into this filing system now:-
A. Assets
- Bank - for bank statements and reconciliations
- Equipment - for copies of invoices for the purchase of equipment over the value of $500
- Land and Buildings - for any financial documents relating to the purchase of land and buildings
- Inventory - for invoices for the purchase of inventory items using the name of the supplier
- Accounts Receivables - keep copies of unpaid sales invoices here. Once they are paid move them to the Income folder. Another option - you could keep one copy here and one copy in the Income folder and then when paid just delete the one from this accounts receivable folder.
B. Liabilities
- Loans - keep copies of loan documents and regular loan statements here
- Credit Cards - for your credit card statements
- Tax - for any tax advice notices or other documents relating to the calculation and payment of your business tax
- Accounts Payable - here you can keep copies of your purchase invoices and then when they are paid move them to the relevant expense folder. An alternative, just like accounts receivables is to keep one copy here and one copy in the expense folder, and then when the customer pays remove the copy from the accounts receivable folder.
C. Equity
- Drawings - for receipts or invoices that you paid for with business funds but are for personal use.
- Capital - keep any documentation relating to funds you introduce to the business.
- Tax - for any tax advice notices or other documents relating to the calculation and payment of your personal tax using business funds
D. Income
- Sales - file each invoice using the name of the customer or the invoice number (or both)
- Misc - for storing any documents relating to miscellaneous income
E. Expenses
List folders in alphabetical order – see deductible business expenses for an example listing, and then in those folders file each document using the name of the vendor/supplier.
If you have a big load of expense documents you can manage them more easily by opening files for each month within each expense folder and store the vendor documents in month order.
If you enter invoices into your bookkeeping software using the date of the invoice, file the documents in that same month.
If you enter them into your bookkeeping software at the date you pay them, then enter them into the computer filing system in the month you paid.
2. Inside the Reports Folder
Inside the Reports folder you can open sub-folders for whatever reports you will need – the main ones are:
- Balance Sheet
- Profit and Loss
- Accounts Receivable
- Accounts Payable
- Cashflow
- Inventory
- Payroll
- Employee Productivity
- ...and more
3. Inside the General Folder
In the General folder you could have folders where you keep:
- Account applications
- Loan applications and loan documents
- Marketing plans
- Budgets
- Virtual assistant agreements
- Social media tracking
- Property title deeds
….. whatever relates to your business that does not directly affect your financial data (meaning whatever is not entered into the bookkeeping software).
Now, Go get Organized!
Now your computer filing system is ready.
What remains is for you to move your scanned or emailed documents into the folders after you have entered the necessary information into the bookkeeping software.
A computer filing system makes it very quick and easy to search for a document you need. This is helpful when the date is years later and you have to find it for a request by the tax authority or by an auditor or simply for your own purposes.
When making your search, you will enter the name of the document into the search bar and press enter on the keyboard.
Your results window should be populated with a list of similar named documents for you to choose from.
As long as you have filed each document with an appropriate name, you will find what you need a lot faster than rifling through a physical/paper business filing system.
You can also check out our business filing system tips for more information on filing physical papers, if that is still your preference or for reasons related to legal matters.


